Monday, October 09, 2006

French Toast Sandwich & Cheesed Cauliflower.

French Toast Sandwich & Cheesed Cauliflower.

you know there's something special between food and i when the dreams that herald my waking up are of meal preparations. sunday morning, i woke to one of such dreams; in it, i saw myself in front of a nice steaming pot of cauliflower laced with parsley and cheese.

hhhhhhmmmmmmmmmmmmmmm....

cheeeeeese with cauliflooooooower......

*rudemoans*

but of course, ryce being ryce--bless that girl bestowed a name meant to remind her constantly of food, she simply couldn't leave the first meal of the day limited to a single dish. instead, she asked to clear as much of the loaf of bread she's kept in the fridge as i can possibly muster before it turns into breeding ground for unpleasant culture. to put a cap on the number of ingredients involved for this meal, french toast seemed an easy option.

Ingredients.
(for steamed cauliflower with cheese)
1 quarter to 1 half, cauliflower
1 tbsp, black pepper
1 tbsp, butter
2-3 tbsp, cheese (i'm using cheddar)
3 bunch, coriander/ cilantro

(for french toast sandwich)
4 slice, white bread
2 eggs
1 tbsp, butter
2 tbsp, milk
2 pc, cheddar cheese
1 tbsp, oil (olive for me; meant for cooking)
(optional: deli ham, roast beef, smoked salmon, etc)

Serves.
2-3

Step 1: Preparing the cauliflower.
mince up the cheddar and coriander together or not, and put them aside for later. i kept them separate because i like to mix the cheddar with the cauliflower before the cheese comes in.

chop the cauliflower up into manageable pieces (aka you can fit it into your mouth without looking rude) and toss them into a bowl. steam those for about 10-15 minutes until cooked; i did it by placing the bowl on a stand in a covered pot of water--water should however not touch your bowl cause we want the vegetable cooked with steam, not latent heat from your bowling water.

Step 2: Prepare french toasts.
while your cauliflower is cooking, mix your eggs, butter and milk together, before soaking each slice of bread into the mixture. heat your pan over a small-medium flame. oil your pan with a bit of oil.

Step 3: Finishing with your cauliflower.
when ready, remove the cauliflower from the heat, and drain the excess juices from the bowl. before the vegetable cools, stir the coriander in, mix well, before you do the same for the cheese. add butter and pepper for taste.
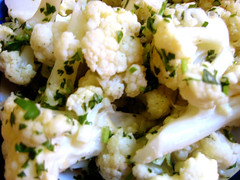
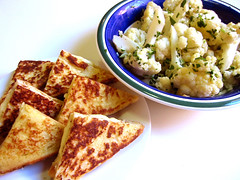
French Toast Sandwich & Cheesed Cauliflower: Steamed Cauliflower with Cheese.

Step 4: Finishing with your french toasts.
when the pan's hot enough, fry your french toast. cook one side till it browns nicely, before you flip it over to cook only for a quick second or two so that the egg more or less is sealed off.

remove from flame, and do the same for another piece. with the first piece that you cooked, place your cheese and--if you intend to add them--ham/ salmon/ beef on the nicely browned surface. when the second toast is ready, place its browner surface on top of the cheese-ham mix.

effectively, you'd have the lighter sides on the outside now. place that french toast sandwich back onto the pan to melt the cheese, as well as to cook the remaining two surfaces of your sandwich.

when both sides are browned, you're ready to serve!

French Toast Sandwich & Cheesed Cauliflower: Fench Toast with Cheese.

Final Serve.

this is a recipe of a reason to why gluttony is a sin. i usually don't have both dishes for a single meal, seeing as how it's an obvious cheese overload.

because of the butter and cheese in the cauliflower, this vegetable side is meant to balance whatever light entree you intend for your meal. to be quite honest, however, i normally take this dish alone--it's terribly filling!

the french toast sandwich is a simple solution to fancy-ing up your regular french toast. better for a brunch menu.
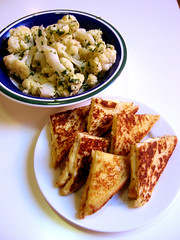
French Toast Sandwich & Cheesed Cauliflower: Final Serve.
Thursday, October 05, 2006

Roasted Honey-Glaze Chicken & Potato Tuna Salad.

Roasted Honey-Glaze Chicken.

sio, ryce and i returned more than an hour ago from an easy night of beer. there's something about a night of alcohol and supper, somehow one inevitably leads to the other. as if the beer or champagne we consume doesn't contain enough carbohydrate to set us back a few grammes.

anyway, there was meat thawing in the sink, left out initially for dinner. i guess it's about time we tried another one of them fuss-free recipes. admittedly though, fuss-free doesn't necessarily mean low calorie count, so i'm just going to avoid eating for the next few days to compensate.

Anna, Billy and i = BFF!

Ingredients.
(for the chicken)
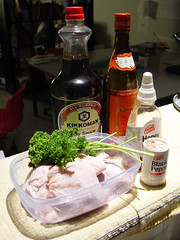
4 pc, chicken thigh (part of chicken negotiable)
4 tbsp, soya sauce
4 tbsp, honey
4 tbsp, chinese rice wine
2 tbsp, black pepper
4 bunch, parsley

Roasted Honey-Glaze Chicken: Ingredients.

(for the salad)
3 potatoes (nude for me)
1 onion (i'm using brown)
1 can, tuna (with olive oil)
1 lemon
4 inch, ginger
3 bunch, spring onion/ scallion
2 tbsp, black pepper (i'm a fan)
1 tp, salt

Serves.
4

Step 1: Marinating the chicken.
mince the parsley into a fine grain, and mix it together with the rest of the marinade ingredients. rub the marinade into the chicken, making sure that you get some marinade (especially the parsley) under the skin. leave the chicken and marinade to soak for at least half an hour.

Step 2: Preparing the salad.
dice the potato, and braise it in boiling water for about 5 minutes with the salt; drain water after. mince the ginger and dice the onion, then mix them all with the potato and tuna. stir the black pepper in and we're ready for the roast.

Step 3: Cooking everything.
set your oven to preheat at about 180degrees for 10 minutes. when ready, put the salad and chicken in. make sure you take both dishes out for a stir (the salad) and flip (the chicken) 15 minutes into the roasting. another 20 minutes and we're ready to remove both from the oven.

Step 4: Finishing the salad.
when the salad's done roasting, mix chopped spring onions in and juice the lemon into the salad.

Final Serve.
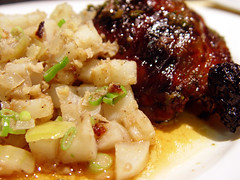
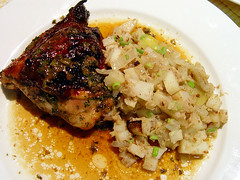
the potato would seem a little crunchy till you bite into it--it's far softer than you'd imagine. if you decide not to use tuna infused in olive oil, just up the amount of ginger and lemon you're adding to the salad. flavouring for the salad should be kept as natural as you can possibly muster. (alternatively, use some of the chicken's marinade left behind by the roast.)

Roasted Honey-Glaze Chicken: Final Serve.

the recipe for the chicken is good also for steaks, and prepared in the grill, on the pan, or at your barbecue.

Wednesday, October 04, 2006

Beef Steak in Port & Camembert Cheese.

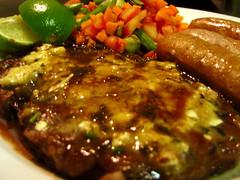
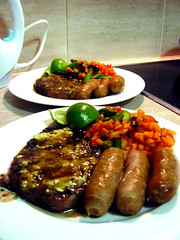
Beef Steak in Port & Camembert Cheese: Final Serve.

the other day at Safeway (Melbourne's answer to Woolworth's), ryce and i picked up--amongst other things--a bottle of Tawny Port, a pack of "special sale" camembert and some "special sale" beef steak. now using whatever's available to us, we thought it would be good to revisit one of my older steak recipes.

along with the steak, we're going to have a simple side of grilled vegetables and a few pieces of Woolworth's cheesy sausages. i'd also explain the vegetables, but not the sausages...

Ingredients.
(for the steak)
2 beef steaks (again i'm using scotch fillet)
1 cup, Port wine
3 tbsp, camembert (i usually use blue cheese)
1 tbsp, black pepper
4 bunch, coriander (i normally use parsley for this dish)
1 tbsp, olive oil (for the pan-fry)

(for the vegetable side)
2 tomatoes
1 carrot
4 asparagus
1 lime
1 tbsp, salt
2 tbsp, sesame oil

(optional)
6 sausages (abt 2" each)

Serves.
2

Step 1: Marinating the beef.
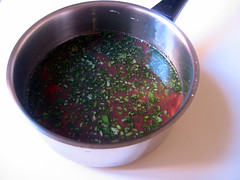
easy: place steaks in bowl, add port, black pepper and minced coriander. stir it about a bit to ensure you've got everything mixed well, and leave it to soak for at least half an hour.

Beef Steak in Port & Camembert Cheese: Marinating.

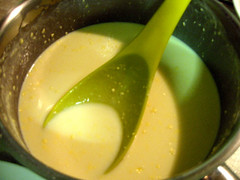
cut the cheese up and mash it up a little so that it's nicely pasty.

Step 2: Prepare vegetables.

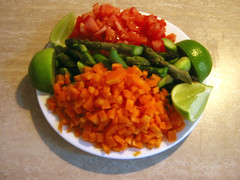
chop the carrot and asparagus up. (by the way, i hope everyone is familiar with the whole rid-the-bitter-end-of-your-asparagus routine.) add them to a bowl, and pour some boiling water into the bowl. add a tbsp of salt and leave everything to soak for about 5-10 minutes. drain water after.

while soaking, dice your tomatoes, and slice the lime into reasonable pieces for easy juicing later.

Beef Steak in Port & Camembert Cheese: Vegetable side.

mix all your vegetables together in preparation for the grill. preheat your oven for about 10 minutes, then set it to about 200 degrees, before setting the vegetables in for about 20 minutes.

when it's done, add the sesame oil to the mixture, and we're more or less done.

Side: Something about sausages.
on today's Huey's Cooking Adventures, Huey brings up a tip on cooking sausages. apparently, before you set it in your pan to fry, you should braise the sausages with warm (not boiling) water for about 5 minutes. if the sausage skin breaks open, you know the water's too hot.

Beef Steak in Port & Camembert Cheese: Sausage side.

NOTE: i can't quite remember the exact type of sausages, or the rationale behind this move, but we got the gist and in Huey i trust.

Step 3: Cooking the steaks!
over a big flame, pour your oil into the pan and let the pan heat up. when it's hot, place your steaks into the pan and let it cook for about 2-3 minutes on both sides (if you're into medium-rare like me).

if you're particular about sealing the meat, you'd have to continuously flip your steaks every 20 seconds until both sides brown.

once cooked, move the steaks off the flame and place them on your serving plates. lower your flame to medium, and pour the rest of the marinade in. let it simmer until it's reduced to about half.

while waiting for the marinade, apply a generous amount of cheese on the top side of the steaks. try to even it out as much as you can.

when the marinade has been reduced, pour that onto the steaks.

Final Serve.
i've served the lime slices together with the vegetables to allow the guest (ryce) free reign in how sour she wants her vegetables to be. the sesame oil will provide some fragrance and taste, but what really gives the punch will be the lime juice.

as much as possible, the steaks should be served right after the marinade is poured. wait too long and you might only have a thin film of cheese left on your steaks since everything else melted away. don't worry that your steaks will be too sweet from all that port, with the cheese, parsley/ coriander and pepper, it will be a really interesting mouthful of beef.

Beef Steak in Port & Camembert Cheese.

enjoy!

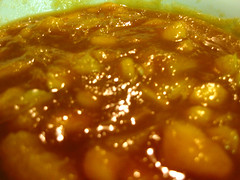
Crepe with Chunky Pawpaw Puree.

Crepe with Chunky Pawpaw Puree.

my weekly detox exercise comprises of refuging at ryce's place in Brunswick, which happens to be in one of them boho-type suburbs. a perfect setting for respite, considering the low buildings, not terribly bad traffic, paced serenity and easy stream of cute lads. as repayment for the peace and quiet, i've made myself in-charge of preparing wholesome meals with whatever ryce has in her kitchen. it isn't too difficult for compared to mine, her kitchen naturally comes with a much healthier rating.

if only i could prevent her from over-snacking now...

:p

our chicken rice from the other night provided us with enough leftover for two rounds of fried rice. with both our lunch and dinner covered, the only logical thing to do is dessert!

Ingredients.
(for crepes)
2 eggs
1.5 cup, fresh milk
1 cup, flour
1 tsp, salt
2 tsp, sugar
2 tsp, butter
2 lemons

(for puree)
3 slice, pawpaw
1 orange
.5 cup, sugar
.5 cup, port wine

Serves.
7-8

Step 1: Preparing the crepe batter.

too simple; mix everything!

my process: beat eggs, add sugar, salt, flour and then milk. slice the lemon, add lemon juice to the mixture, and grate some lemon zest into the mix.

set aside in the refrigerator for about 1 hour.

Crepe with Chunky Pawpaw Puree: Crepe batter.

NOTE: most people like to add 1 tbsp of vanilla extract into their batter. personally, i like to keep it fruity. my general rule is to balance tastes, therefore in this case, my puree is largely sugary, so the batter gets a hint of citrusy instead.

Step 2: Preparing the puree.

dice the pawpaw into smaller-than-bitesize pieces and add that into a pot.

skin your orange, and very carefully extract the pulp without juicing it. we want to keep the juice in it.

over a small-medium flame, add sugar into the pawpaw and keep stirring. when the mixture caramelises (it browns), add the port in and let the whole thing come to a slow boil--that should take 5-7 minutes. once it boils, remove from flame and leave it to cool.

throw the orange pulp in once it has cooled.

Crepe with Chunky Pawpaw Puree: Cooked puree.

NOTE:

1) purees are normally processed to a fine grain. i like mine slightly coarse for dessert because i always have something smoother to match. when you stir the puree over the flame, you'd notice that the bits eventually break into smaller parts, so no worries about over-chunkiness.

2) my usual puree comprises strawberries (sweet) and kiwis (sour). you can basically use any fruit to make puree, so try it with your favourites!

Step 3: Cooking the crepes.

pan. medium flame. some oil.

oil your pan before you start on any crepe. abt 1 tsp is more than enough for a good wok--ryce has a Tefal wok-pan.

i add 2 rice-scoop (roughly 2 tbsp) worth of batter into the pan, and let it set and cook for about 3 minutes. the edges will brown, and when it's more or less cooked, you'd realise that they slip off the pan quite easily. lift it with a spatula to check that it's nicely browned on the underside, before you flip it over to cook for another 2 minutes.

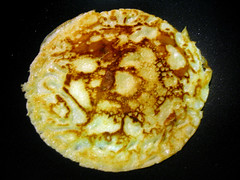
Crepe with Pawpaw Puree: Frying crepe.

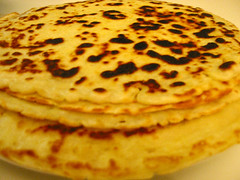
when you're all done, you'd have a short pile of 7-8 crepes!

Crepe with Chunky Pawpaw Puree: Crepes!

Final Serve.
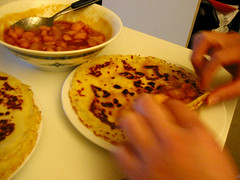
to make it fun, let your friends roll their own crepe. as ryce will demonstrate:

1) spread puree sauce over the crepe. pour some puree bits enough to cover slightly less than the bottom half of the crepe, from which you'd start rolling.

Crepe with Chunky Pawpaw Puree: Step 1.

2) keep it tight, and slightly let the puree flow to the side and keep rolling till you get a nice roll that wouldn't flip open.

Crepe with Chunky Pawpaw Puree: Step 2.

3) EEEEEET!

Crepe with Chunky Pawpaw Puree.

good with some french vanilla ice cream or whipped cream! of course, completely sinful so go. very. easy.

Bon Appétit!

Lemon-Mango Chutney Chicken

Ah. Strangely familiar-sounding isn't it? =)

This dish was a little bit of an experiment.

I was in the supermarket earlier and bought a lemon for 15pence.

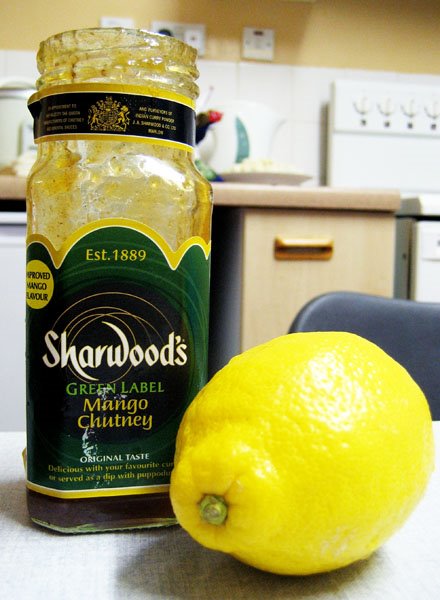
We had chicken thighs in the freezer and some really good but cheap mango chutney from a supermarket special (i'd bought it not knowing what to do with it and so it was just sitting in the fridge).

So I figured, why not make some Lemon Chicken?

I know it's sweet, and sour and crispy.
So, my dear partner in the kitchen, Chef Wai, and I decided to give it a whirl.

Mind you, we don't actually know what goes into making real Lemon Chicken, but we both remember it's taste and texture and look.

And it seems, we made it happen! Thumbs up from the whole house! Woohoo!!!

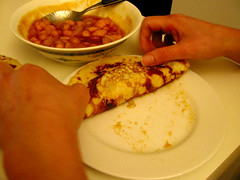
Successful experiment. Very Simple too ... try it!

--------------------------------------------------------

Lemon-Mango Chutney Chicken
(serves 5)

Ingredients:

2 Chicken Thighs
1/2 Lemon
4 tbs Mango Chutney
1 tbs Sugar
1 ts Corn flour (for thickening)
spring onion (for garnishing)


Step 1: Preparing the Chicken

defrost, wash and debone the chicken thighs.

then give the chicken a massage with the back of a knife or a pounder to tenderise the meat and flatten it out to create a bigger surface area. (frankly, it really just feeds more people for less.)


Step 2: Preparing ingredients for the Sauce


slice your lemon in half and make 4-5 thin slices for garnishing (you leave that aside).
take the remaining lemon and squeeze out the juice andsome pulp into a bowl.


Step 3: Fry the Chicken

what it says -fry the chicken till its golden brown.

try not to be afraid of the oil. it WILL splatter. so be careful. and don't panic. this is hot oil we're talking about.

it takes about 8 minutes or so to totally cook one piece of chicken on both sides. so while you're doing this, you can meddle with the sauce simultaneously.


Step 4: Cook the Sauce

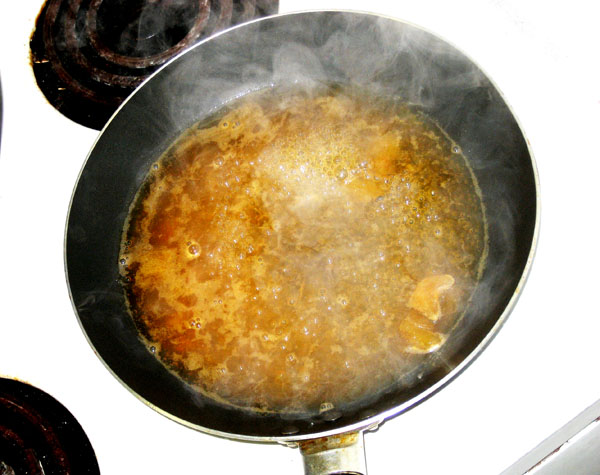
take a frying pan or saucepan and gently simmer the mango chutney and lemon juice till it mixes nicely. add in the sugar to soften the sour bite.

the sauce will be a little watery at this point, so mix the corn flour with water and slowly stir it into the sauce.

it should now be the color and consistency of liquid warm caramel.


Step 5: Cut the Chicken

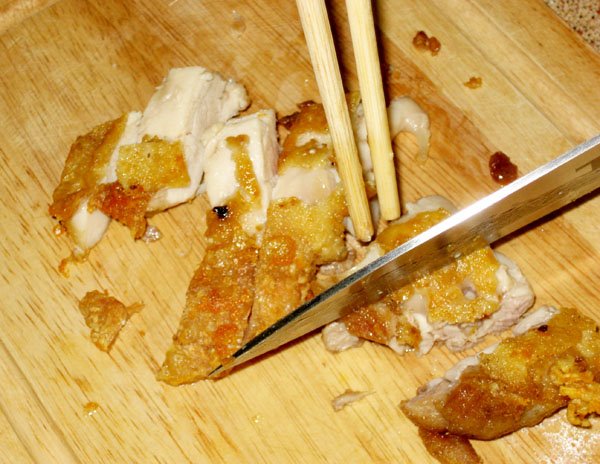
your chicken should be done by now. so drain it of the excess oil and cut it into bite sized strips and place it nicely in a dish.

be careful! its hot!


Step 6: Sauce, Garnish & Serve!

pour the sauce over the chicken, place lemon slices on top everything and to add a little pizzaz, you can add an artfully sliced sprig of spring onion on top of that.

the final product ...


WOOHOOOOOOOOOooooooooooooooooooo!!!


nice. *burp*

till next time!

Tuesday, October 03, 2006

Hainanese Chicken Rice.

(hainanese pronunciation in italics: Hai Nam Ko'ei Pu'wee.)

to my Ah Mah (though it should be Ah Por) back in Singapore, and my Ah Kong's carefree spirit in Tien Swee.

this particular dish comes with a certain history that is extremely close to my heart. for the uninitiated, i come from a pure hainanese family in which my grandparents (both paternal and maternal) were immigrants from the sunny island of Hainan--they moved from one tropical island to another mid-20th century. while i'd like to claim to know the perfect recipe for the chicken rice attributed to my heritage, it might come as a surprise that the popular variety that everyone's familiar with is not exactly the way it's prepared in hainan. this was observed in a trip i made with my father and grandma to Hainan, in order to return my grandfather's ashes to his home village.

the recipe is famed to have originated from the city of Wenchang (Boon Sio Kwai), which happens to be the city closest to my father's home village, (literally translated) New Village (Tien Swee), just about half-an-hour drive away. the funny thing is that over there, this dish--at its most esteemed and only on very special occasions--is often prepared with a young rooster instead of a hen. the meat is supposedly tastier but chewy. hainanese families in singapore who sell the dish are often from either similar neighbouring villages or Wenchang itself. in fact, many of such immigrant families ended up settling in Purvis and its neighbouring streets, where they started eatery businesses; that's the reason you have so many chicken rice stalls on a single street. other than chicken rice, hainanese families were also involved in other food businesses like coffeeshops and western food stalls.

when i was young, i remember my grandparents being very particular about the proprietors of chicken rice stalls. till this day, my grandma makes it a point to know if the vendors behind these "Hainese Chicken Rice" stalls in the neighbourhood were indeed hainanese, although my favourite stall happens to be run by a hokkien family. having been a boat-chef in his earlier days, my grandfather retired to become the house-chef in my family. chicken rice was more or less a staple for sundays. as a big fan of the dish, i would help my grandfather set up the chopping board and stool, in eager anticipation for him to chop the meat up. as he hammered away with the chopper, i would be squatting by him like a hungry vulture, feeding on the bits and pieces that slipped off his blade.

like many other dishes (e.g. Peking Roast Duck) that move beyond their place of origin, the popular version of hainanese chicken rice is largely a local update of the original recipe. what i'm sharing today is, therefore, a hybrid of what my family has shared with me, and what i've learnt about the popular version you get from eateries.

Ingredients.
(the chicken)
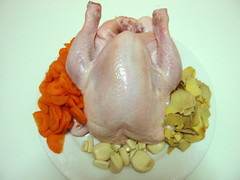
1 whole chicken (Small)
6 clove, garlic
2 inch, ginger
1 carrot
4 bunch, spring onion/ scallion (which i'm missing)
1-2 tbsp, salt
1 tbsp, chicken stock
4 tbsp, sesame oil

Hainanese Chicken Rice: Main Ingredients.

(the rice)
3 cup, rice (i like thai jasmine)
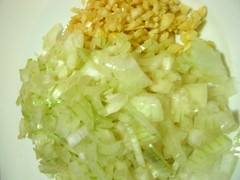
1 onion
4 clove, garlic
broth from the chicken

Hainanese Chicken Rice: Rice Ingredients.

(chilli sauce)
5 red chilli (i like to add 3-4 chilli padis)
2 clove, garlic
3 bunch, coriander
1 tbsp, sesame oil
4 tbsp, fresh lime juice
broth from the chicken

(optional vegetable)
2-4 bunch, choy sum or bak choy.

Serves.
3-4

Step 1: Prepare the chicken, base and rice.
chop the carrots and the ginger, bruise the garlics and tie the scallions into a knot. throw all those into a sizeable pot filled with enough water to drown the chicken. add the chicken stock and bring to boil.

meanwhile, rub salt all over the chicken.

chop the onion and garlic for the rice. wash the rice, and let it set in water for about half an hour, then drain the water away.

Step 2: Cooking the chicken.
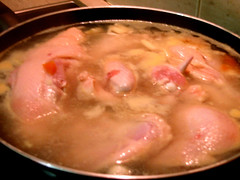
when the base comes to a boil, lower the chicken in, breast-down. put a lid on your pot, lower the flame and let it cook for about 15-20 minutes, and then flip it over for another 15-20 minutes.

Hainanese Chicken Rice: Chicken cooking in broth.

immediately after, bring the chicken out and drown in a ice-cold water for a few seconds. this arrests the cooking so that your meat doesn't overcook. quickly take that out, and spread sesame oil all over the chicken before the skin turns a shade of dark.

chop the chicken up into appropriate sizes.

(p/s: in this attempt, i've chopped the chicken up so that i can fit it into the biggest available crockery.)

Step 3: Cooking the rice.
scoop the layer of oil from the broth and pour it into a wok over a medium flame. when the wok is hot, throw the garlic and onions in and stir till it starts to brown a little. pour the rice in and fry the rice until it too turns a shade of translucent brown. transfer all that into your ricecooker, and pour as much broth as it normally takes for you to steam rice with water. set to cook.

Step 4: Chilli sauce!
mince the chilli, garlic and coriander up. pour the sesame, 2 tbsp of broth and the lime juice into the mixture.

Step 5: Vegetable soup.
chop the vegetables up, throw them into the soup and bring the soup to a boil.

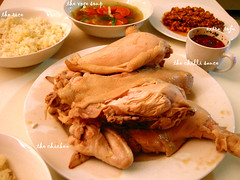
Final Serve.
traditionally, one of the dips is a garlic one made up mainly of minced garlic mixed with some broth. the hainanese still use that dip more than they do chilli, but i've gotten used to eating my dips extra hot.

i love broth from cooking this dish. you can always depend on it to provide a fabulous base for your green vegetables.

Hainanese Chicken Rice.

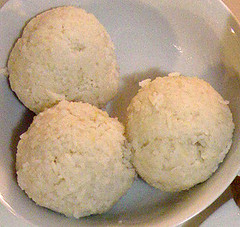
also traditionally, my grandma would roll the rice into hand-sized balls. i believe this came from making it easier to hold the rice for lunch out in the plantation fields. i didn't roll them this time, but below's an example of what i did some time ago.

Hainanese Chicken Rice.

Sunday, October 01, 2006

Grilled Beef & Asparagus.

Grilled Steak & Asparagus.

i learnt of this simple but rather delicious steak recipe from a friend of mine, Rico Stanley. he actually introduced me to my current favourite cut of beef, scotch fillet, which he marinated with the recipe i'm about to share. the recipe is good for grill, barbecue and pan-fry.

as a mid-afternoon snack, i'm serving this up to ryce and sio with just a bit of asparagus and onions.

Ingredients.
(for the steak)
3 cut, steak (scotch fillet in my case)
6 tbsp, oyster sauce
4 tbsp, soya sauce
3 tbsp, olive oil
6 tbsp, chinese rice wine
2 tbsp, black pepper
1, onion (optional)

(for the asparagus side)
6 stick, asparagus
1 tbsp, salt
1 tbsp, pepper

Serves.
3

Step 1: Preparing the steaks.
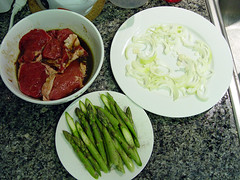
very simple, mix all the ingredients (except the onions) together, and leave the meat to marinate for about twenty minutes.

chop the onions up and spread them on a plate as a base for the steaks to sit on in the oven.

Step 2: Asparagusing.
cut the asparagus and erm... that's it. i've been told that you can give the asparagus a salt bath (soak them in water and salt for about ten minutes), but i like to keep the taste of asparagus as untainted as possible. so i generally don't like the salt bath.

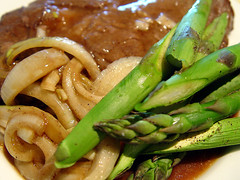
Grilled Steak & Asparagus.

Step 3: Grilling everything.
here's the slightly tricky part because we all like our steaks cooked differently. this round, i'm doing medium-rare. i've set the steaks and the marinade on the bed of onions so that onions will grill nicely in the marinade.

preheat the oven at 250degrees for 5 minutes, and i leave the whole plate in for about 5-10 minutes, before flipping the beef over for the same amount of time. just be careful not to overdo your steaks.

if you like it fully cooked, you can just leave the steaks in for a slightly longer period of time. simple.

i left the asparagus inside to cook for the whole 20 minutes.

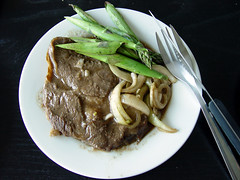
Final Serve.
sprinkle pepper and salt on the asparagus for added taste. take the onions out and serve them as a side as well.

Grilled Steak & Asparagus.

Verdict.
we like it, but only because we're such suckers for marinade. i've prepared this for another friend before, and he wasn't a fan of strong marinades--he liked his beef tasting only of beef.

if you like the recipe, but want to taste your beef still, i suggest a thicker cut of beef. this would help tremendously.

the asparagus was juicy and a little crunchy. tasted well on its own, but i did sprinkle salt and pepper on it. thought it was a nice balance to the marinated meat and onion.

Saturday, September 30, 2006

Grilled Fish with Asparagus Rice.

seeing as how i will be without a computer for a while, i thought i experiment with another person's recipe. completely stunned by how beautiful lara's recipe looked, i decided to adapt it to whatever's available in my kitchen.

Ingredients.
(for the grilled fish)
4 cut, fish (i'm using trout)
1 tbsp, salt
1 cup, rice wine
1 inch, ginger
1 tbsp, black pepper

(for the asparagus rice)
4 stalk, asparagus
1, onion
3 clove, garlic
3 cup, rice
4 tbsp, butter
4 tbsp, black pepper
4 cup, fresh milk

(optional side of salad)
5 leave, lettuce (iceberg)
1 capsicum
4 tbsp, balsamic vinegar

Serves.
4

Step 1: Preparing the Rice.

Grilled Fish with Asparagus Rice.

dice the asparagus, onion and garlic. wash the rice, and leave it to soak in water for about half an hour. drain the water after.

Step 2: Preparing the Fish.

Grilled Fish with Asparagus Rice.

chop the ginger up, then toss it into a bowl with the fish inside. rub the black pepper and salt into the fish as well, then pour the rice wine in. leave the fish to marinate for about 20-30 minutes.

Step 3: Cooking the Rice.
fry the garlic, asparagus and onion with the butter in a wok over a small flame. this lasts for about five to ten minutes till everything's nicely cooked. then throw the rice in and fry it for a while before you pour the milk in. put a lid on and leave the rice to cook for about 20 minutes.

Step 4: Grilling the Fish.
Preheat the oven at about 150degrees for about 5 minutes, then set the fish to grill at that temperature for about 15 minutes.

Final Serve.
after setting the rice, i sprinkled black pepper on it. i'm serving the fish and rice with a side of capsicum and lettuce, doused in balsamic vinegar.

Grilled Fish with Asparagus Rice.

Verdict.
the fish was quite nice, but the rice turned out to be really bland! i recommend some cream cheese to be added to the rice in Step 3 if anyone were to try my recipe. all in all, dinner turned out to be beautiful but not too exciting taste-wise.

stick to lara's recipe.

p/s: there will be no updates from me till i get a new laptop.

===
ETA: 1 2250 Oct 2006, Sunday
i better add that i only just realised that i had burnt the wok i cooked the rice in. because of this, i suggest people either a) keep stirring, or b) transfer the mixture into a rice cooker instead.

argh.

Thursday, September 28, 2006

effortless ABC Soup for the busy student

Right.

I'm supposed to be writing a paper right now, and i didn't have the time to take any pictures of tonight's meal, so we're going to have to use a little bit of our ... IMAGINATION.

this meal is by no means imaginary, it is rather economical and very delicious when you have no time or variety of ingredients to cook for 4 people.

and you serve it as is.
no fuss, no frills, minimal washing up.
one pot, one person's problem.

so here goes, a recipe for what some people call: ABC SOUP

--------------------------------------------
Ingredients (serves 4)

4 carrots (regular sized)
4 potatoes (medium sized)
4 onions (medium sized)
1/3 chicken cube
1 slab of lean pork (wholly optional add only if u want some meat. can be substituted by any other meat really. just be aware of how to prepare the meat beforehand.)
salt & pepper to taste

step 1
peel and wash the A-carrot, B-potatoes and C-onions.

step 2
cut everything into bite-sized chunks and dump into the pot.

(Optional step)
cut up pork into bite sized cubes and marinate with soy sauce for about 10 minutes. then throw it in the pot with everything else.

step 3
fill the pot with water to reach about 2 litres of water (or a little more if u want more soup), throw in the 1/3 chicken cube and let the pot cook till al the ingredients cook through and the soup becomes infused by the sweetness of the now tender carrots, onions and potatoes. add salt and pepper to taste.

-----------------------------------------

this dish should take about 30 minutes to cook itself. just rememeber to check on it on occasion, so your kitchen doesn't burn down by accident.

safety first :) we actually had to run out of the building for 10 minutes beacuse of a badly timed firedrill. you can always turn your cooker off and come back to it later. its so simple a recipe that even that works.

so, with our IMAGINATION,

visualise a piping hot pot of tender vegetables in a sweet and savoury broth with succulent chunks of meat ...

best served with steamed rice and chilli padi in soysauce dip.


and thats ABC soup.

back to paper writing! try it!

Wednesday, September 27, 2006

Roast Salad with Parsley Butter.

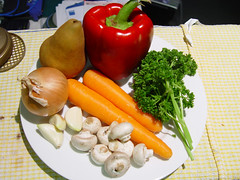
my housemate-cum-regular-dinner buddy, sio, requested to have some chicken tonight. we bought ourselves Woolworth's Herb & Mustard Marinade last night and figured to try that out, so my contribution for today is a side dish instead.

Ingredients.
1 capsicum (red, for color)
1 pear
2 baby carrot
3 clove, garlic
8 button mushroom (i normally prefer cup mushrooms)
1 onion (i prefer spanish, but i only have brown)
3 bunch, parsley
1 inch, butter (sorry, don't know how to measure this properly)
3 tbsp, black pepper
2 bunch, spring onion/ scallion

Roast Salad with Parsley Butter, Ingredients.

Serves.
3

Step 1: Choppity-Chop-Chop the Salad.
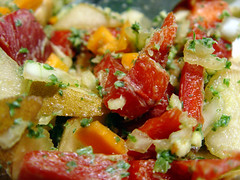
dice capsicum, carrots, pears, mushrooms and onions. toss them together to get a nicely colored salad.

The salad.

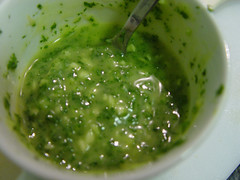
Step 2: Parsley Butter Sauce.
mince the parsley and garlic together into a fine grain.

melt the butter in your microwave for abt 10 seconds, and stir that into the parsley and garlic mixture.

Parsley Butter.

pour all of this into the salad and toss well to get an even coat of sauce on the salad.

Salad with sauce.

Step 3: Prepare your main.
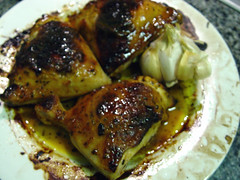
this will be a good time to prepare your main dish because the salad will roast quite quickly. our main for tonight is chicken thigh in an off-the-shelf herb & mustard marinade. three pieces of chicken thighs marinaded and left to soak in the flavour for about 20 minutes. Roasted at about 180 degrees for about half an hour (but i'm really bad at roast/ grills in the oven, so please check your meat yourself).

Herb & Mustard Chicken.

(sio wanted to have some roasted garlic, so she threw those in with the chicken.)

Step 4: Roasting the Salad and Final Serve.
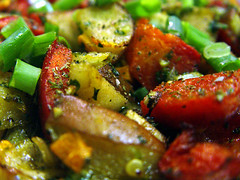
into the last 15 minutes of roasting my main, i set the salad into the oven at 180 degrees for about 15 minutes. the salad should look nicely browned.

when the roasting is complete, bring the salad out and mix the black pepper in. chances are, the salad is going to taste very sweet, what with the butter and pear. so you'd want to adjust the amount of pepper accordingly. i topped it with the spring onions for added flavour.

Roast Salad with Parsley Butter, final serve.

Verdict.
we like it! but it really is quite a sweet salad so make sure your main appropriately balances that out.

Tuesday, September 26, 2006

Coriander Pan-Fried Lambchop.

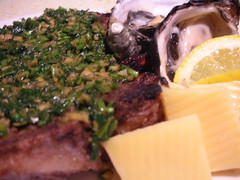
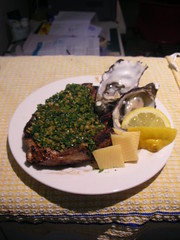
Coriander Lambchop, served with edam cheese & oysters.

this is actually an alteration of what EDible suggested, however i've replaced chicken with lambchop, and cilantro with coriander.

don't ask.

Ingredients.
3 clove, garlic
1 inch, ginger
2 lambchops
3 tsp, black pepper
2 tbsp, olive oil
2 tsp, salt
6 bunch, Coriander
*some* chinese rice wine

Serves.
2

Step 1: Preparing the Lambchops.
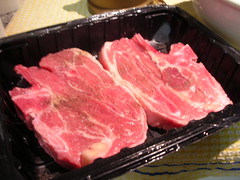
rub salt and 2 tsp of black pepper onto lambchops. normally, this would do, but i love chinese rice wine with my red meat. so i splashed about 4 tbsp of rice wine onto the lambchops.

Lambchops prepared with salt, pepper and chinese rice wine.

set aside for about half an hour.

Step 2: Preparing Coriander.

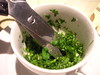
Mincing coriander in cup!Mincing coriander in cup!

MINCE!

if like me, you don't have a mincer/ food processor, cut your coriander into a cup and start cutting it up in the cup. (i stole that food processing idea from learning how to mince some inedible leaves for erm... other purposes.)

ANYWAY.

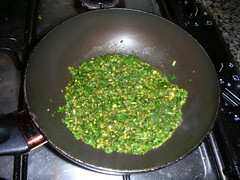
chop the garlic and ginger up, and throw those into the cup and mince along. then throw the rest of the black pepper and olive oil into the mixture.

heat up a small pan over a small flame, and throw the mixture into the pan for a slow simmer. (Edible's instructions for the Cilantro doesn't require this, but i like to release added fragrances with some heat.)

heat for about a minute or two, then remove from flame.

Heating the coriander mixture in a pan.

Step 3: The Rest.

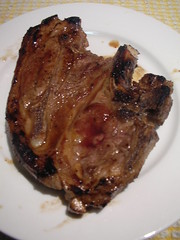
pan-fry the lambchops to whatever degree you like it. over a medium flame would be good, anything bigger would cause it to burn before it even cooks in the middle.

Get something like this might be nice.

serve on plate, and coat top of lambchop with the coriander mixture.

for this dinner, i'm throwing some edam cheese and oysters!

DSCN3919

Verdict.
my housemate, sio, says she "really like(s) it".

i thought coriander might have been a good substitue for mint and parsley, but clearly i was wrong because coriander just doesn't have strong enough a flavour. the garlic seemed to overpower the mixture a little, so if you're a fan of coriander like i am, perhaps you'd like to try less garlic.