Showing posts with label entree. Show all posts

Monday, May 28, 2007

Shao Xing/ Rice Wine Chicken.

Shao Xing Chicken.

i like how sometimes i psyche myself up bad to cook a particular dish, but see it take a completely different course half-way through the cooking process? yeah, i'm weird like that. anyway, i was going to prepare the usual honey-glazed chicken schtick, but when i got all the ingredients together, i decided to try something completely new instead.

Shao Xing (more often referred to as Chinese Rice/ Cooking Wine) Chicken is a dish i used to indulge in whenever i had the opportunity to visit Cantonese restaurants in singapore. i've never really gotten down to its true recipe--mostly because my family doesn't cook it, but from what i can tell, it's a lot about drowning your chicken in rice wine. drowning dead birds in alcohol, can't be that hard!

so this is NOT the authentic recipe, but it's nice enough to enjoy with my bowl of rice.

Ingredients.
2 pieces, chicken drumstick & thigh (i.e. 2 drumsticks, 2 thighs)
2 inch, ginger (finely sliced/ diced)
2-3 cloves, garlic (bruised and minced)
3 sprigs, spring onion (finely sliced)
1.5 cup, chinese rice/ cooking wine (dark variety)
1 tbsp, salt
1 tbsp, ground white pepper
1 tbsp, light soy sauce (which i find optional, but only because i'm weird)
1 tbsp, sesame oil

Serves.
2

Step 1: Marinating the Chicken.
combine all the ingredients into a bowl, and just massage the marinade into the chicken for about 5-10 minutes, before sealing the bowl up with some wrap, and leaving that to marinate for at least 3 hours (i like overnight because the marinade really gets into the meat).

Step 2: Double-Boil.
when ready, just transfer that bowl onto a steaming rack in a nice big pot. fill that with water until the water reaches about the centre of the bowl. put the lid on, switch your medium-flame on and let everything boil for at least half an hour; stop depending on how cooked you like your chicken. a full hour more or less guarantees well-cooked meat.

Shao Xing Chicken: Double Boiling.

Removing & Adding Oil.
the fat from the chicken probably melted to give you a layer of oil on top of the gravy. if you're not a fat of that, which makes no difference to the taste for the dish, then slowly remove that layer of oil. after that, add the sesame oil in.

Shao Xing Chicken: Cooked.

i know; the irony!

Final Serve.
simple dish, but pretty delightful results i thought. served well with some rice as a main, side or entree!

Shao Xing Chicken: Final Serve.

Wednesday, May 09, 2007

Stir-Fried Beef Salad.

Stir-Fried Beef Salad.

it's strange how i find myself cooking at the best of times and at the worst of times. when i'm happy i cook to please; when i'm depressed, however, i cook to relieve my mind of the looming unhappiness. from my experience, i can vouch that the old adage applies: love is an important ingredient for good food. clearly, i'm not meant to be a full-time chef.

today's recipe, sadly, stems from the sad side of life :(

anyway, enough of my bs. this recipe is a rehash of my housemate, linzi's. much credit goes to her then.

Ingredients.
500g of sliced beef (they sell in Asian Grocers for steamboats)
4-5 potatoes, skinned & diced (Desiree)
6-7 baby carrots, skinned & diced
2-3 onions, skinned and diced/ sliced (brown)
3-4 cloves, garlic (bruised and minced)
5tsp chinese rice wine
3tsp cooking oil (olive in my case)
3tsp honey
2tsp crushed basil leaves
2tsp chilli flakes
2tsp five spice powder

Stir-Fried Beef Salad: Main Ingredients.

Serves.
3-4

Step 1: FRY! FRY!! FRY!!!.
before you start, start your oven to about 220degreee Cel.

heat your pot/ wok over a medium flame. when it's hot enough, fry the garlic and onion till brown. add the beef strips in, and before it cooks fully, add the condiments (i.e. wine, honey, basil leaves, chill flakes and five spice powder). stir-fry a little more, then add the vegetables.

fry everything till the vegetables are more or less cooked, remove from fire and transfer to an oven-safe ware.

Stir-Fried Beef Salad: Post-Stirfry.

the oven should be ready by now. cover the food with some foil and set the salad into the oven for about twenty to twenty-five minutes.

Stir-Fried Beef Salad: Into the Oven.

remove from oven, leave the foil on for at least ten minutes to trap some steam, before serving.

Final Serve.
good with some mash, rice or any other form of carbo. or eaten alone really.

Stir-Fried Beef Salad: Final Serve.

Saturday, March 24, 2007

Dark Sauce Pork.

Fuss-Free Dark Sauce Pork.

since we're all pressed for time thesedays, i'll share another fuss-free recipe handed down to me by my granny. the dish is quite a popular (or at least common) one that you can find at most ala carte cooked-food stalls back in singapore. as per normal, my granny does it slightly differently from the rest.

due to the fact that i lack some necessary ingredients for the full-blown recipe, i'll be delineating the differences between what my gran does and what i've done. this way, anyone attempting the full recipe might get a notional understanding of going about cooking it.

Ingredients.
500g, San Chen Rou (三辰肉)--literally, three-layer meat/ pork* (i'm using spare ribs instead because it was all i had in the freezer)
10-12 pieces, Chinese Dried Mushrooms (shitake's good)
4-5 cloves, garlic
2 inches, ginger
2 tbsp, Five Spice Powder
5 tbsp, Chinese Rice Wine
1.5 tbsp, ground white pepper
2 tbsp, light soy sauce
.5 cup, dark soy sauce
2 tbsp, sugar

Fuss-Free Dark Sauce Pork: Ingredients.

Missing In My Attempt:
5-6, egg
200g, dried tofu

Serves.
4

Step 1: Preparing the meat and everything else.
chop the meat up into bite-size portions, and braise the pork with abt 1.5l of boiling water, and drain the water away. my grandma says it rids the pork of its overly pungent taste.

soak the mushrooms in boiling water until they're all soft. put the water aside to be used for the cooking later. slice the mushrooms.

bruise and dice the ginger and garlic.

full version:
slice the dried tofu into bite sizes.

hard boil the eggs, shell them and set aside for cooking later.

Step 2: The Cooking.
oil your pot or wok and set it on top of a medium flame. when hot enough, throw the garlic and ginger in and stir fry for a minute, making sure that you don't brown it too much.

throw the pork and mushrooms in. add the water in which the mushrooms were soaked as well. stir fry for a bit, before you throw everything else in: (in no particular order) light soy sauce, five spice powder, ground pepper, rice wine, dark soy sauce, and sugar.

bring the whole pot over to your smallest flame, put a lid on it. leave to simmer for about half an hour.

Fuss-Free Dark Sauce Pork: Preparation.

full version:
before you put the lid on, throw the eggs and tofu in. let them soak up the sauce and simmer with the rest of the ingredients.

Final Serve.
like i always say: best served with rice! (yes, i'm a proud yellow, rice-loving "smells a bit like soy sauce" chink.)

Fuss-Free Dark Sauce Pork: Final Serve.

Additional Notes:
San Chen Rou. i'm quite sure this refers to streaky slab, seeing as how they both refer to the cut from the pig's belly. it's important to use this cut of the pork because this dish actually depends on the oil you'll get from the layers of fats for additional taste. and yes, it gets pretty oily after a while, so consume with discretion.

Recooking. my grandmother reboils the dish whenever we have a meal. the more you recook it, the nicer it gets. basically, it takes time for all the ingredients to infuse one another. so if you can, cook a whole pot of it and experience the wonders of this dish getting tastier by the day. you may also add new hard-boiled eggs whenever you run out.

Wounds & Dark Sauce. the chinese believe that people with wounds that are still healing should avoid eating dark-colored food, especially dark sauce. it causes the wound to heal with a dark tone; i've got brown patches on my legs from when i was young as evidence. seeing as how i just got inked at the nape, i really shouldn't be promoting this recipe right now. oops :(

Saturday, January 13, 2007

Stone Soup sans Stone (aka Beef Stew).

Stone Soup with Rice.

Background.
one of the most popular children's stories is perhaps that of the stone soup. lest you've never heard of it (and just where have you been?), a hobo chances upon a village and convinces its people that he has magic stone capable of making the best soup ever. the only problem is that his magic stone required the help of some garnishing, which he didn't have.

impressed and eager to savour the wonders of that magic stone, each village household contributed something from their kitchen. from celery, to potatoes, to meat, every item was added to the pot as an exchange for a portion of that magically tasty soup. with that many ingredients added to the pot (with the stone in it), the soup naturally turned out amazingly delicious.

Wikipedia would have you believe that the moral of the story lies in the virtues of co-operation, but i like to see this as simply good marketing. at most, it's an ingenuity for cooking leftover ingredients. this story has inspired so many people that it has come to a point where some people are actually taking the recipe as illustrated in the story quite seriously...

anyway, a fortnight ago when i was desperately trying to rid my then soon-to-be-rotting vegetables and expired scotch fillets, i thought i'd give this Stone Soup--sans stone and storyline recipe--idea a try, and it actually was quite lovely.

i realise that this recipe might sound a lot like a beef stew.

ack.

beef stew. d's stone soup. po-tah-to. po-teh-to.

Ingredients.
2 pieces, beef steak (i'm using t-bones for their marrows)
2, carrot
3-4, potato
2, mustroom (i'm using cups)
2, tomato
2 sticks, celery
1, onion
3-4 cloves, garlic
2-3, red chilli (depending on how spicy you like the soup)
1, lemon
2 stalks, spring onion/ scallion
1 bunch, parsley (abt 5 stems worth)
1 tbsp, black pepper
4 tbsp, butter (optional; see Step 2)
1 cup, flour (optional; see Step 2)
2 tbsp, red wine (optional; see step 3)
4 tbsp, honey (optional; see step 3)

Stone Soup: Ingredients.
(missing in picture: onion, garlic, spring onion)

Serves.
4-5

Step 1: Chopping, Slicing and Dicing!
chop, slice, dice the steaks and vegetables, then have all of them thrown into a pot. add enough water to drown all the ingredients and start your fire. i recommend a small to medium flame, on which you allow the soup to cook very, very slowly.

Stone Soup: Into the Pot.

when the soup comes to a boil, add the pepper and lemon juice in and allow everything to simmer till it reduces to about 4/5 to 3/4 of the original amount. stir intermittently.

after at least half an hour, you can taste the soup and see if you're happy with the results so far. if you are, *ta-da*, you're done and can skip the next two steps.

Step 2: Thickening the Soup.
if you'd prefer a slightly thicker soup (stew-like), you'd have to thicken the mix.

first, melt the butter in a bowl, and stir in the flour slowly until you've got all the flour mixed with the butter. coating the flour with butter prevents the flour from clumping up when you add it into the soup.

slowly stir the buttered flour into the simmering soup, and let everything boil for another 5 to 10 minutes, or until the soup thickens.

(taste it, and if you're happy so far, skip the next step.)

Step 3: Adding Extra Unimportant Clear-Before-They-Expire Things.
i'm simply adding what's left of my red wine and honey into the soup, then let simmer for another five minutes.

Stone Soup: Brewing in Crock Pot.
(see additional notes below on use of slow crockery pot cooker.)

Final Serve.
the versatile stone soup can be enjoyed as a main (accompanied by bread or steamed rice), or as an appetiser or a side.

i like mine with rice!

Stone Soup: Final Serve with Rice.

everyone should try to make hir version of the stone soup out of the odds and ends lying in your kitchen. as my friend, fiq, likes to say: just throw them all in and hope for the best!

;)

Stone Soup with Rice.

Additional Notes.
1. Use of Crock Pot. i'm leaving everything in a slow crockery cooker overnight. additionally, slow cooking it allows the meat to get really very tender. you needn't go to such a drastic measure, because direct heat works just fine. just be sure to be slightly patient to allow the soup to boil in due time.

2. Recooking. the remainder can be reboiled whenever you decide to have some. the more you boil, the thicker and tastier it gets really.

3. Not Stew-like. i used .5 cup of flour instead of the recommend 1 cup as described above. this is just a personal preference of not wanting the soup to end up stew-like.

Saturday, December 30, 2006

Pork Rib & Lotus Root Soup.

Pork Rib & Lotus Root Soup.

it's now ascertained that moving house is nothing if not a bitch. after what seems like forever, i've finally got myself more or less settled into the new place in the city. plus, i bought me some new kitchenware to celebrate the move; am now a proud owner of (among other things) a handheld food processor and the loveliest TEFAL wok! not to mention i'm absolutely in love with the new kitchen, pity the dishwasher doesn't really work.

anyway, back to today's dish!

personal history.
this is one of my favourite recipes, something passed down to me from my grandmother. it's arguably one of the few dishes of hers that i enjoy over-eating since i was a kid.

in general, the dish is quite a common sight in chinese families. however, what i've learnt from many of my friends is that most of their families and in fact hawkers leave the soup in its 'natural' flavour. my grandmother swears by a bit of rock sugar, and for that i think she rawks!

Ingredients.
500g, pork ribs (much of the flavour comes from the bones)
200g, lotus root (washed and sliced)
1.5 cup, dried red dates
1.5-2 cup, raw peanuts
1.5 cup, chinese lycium
1 cup, rock sugar
a few cups, hot water (enough to drown all the ingredients)

Pork Rib & Lotus Root Soup: Ingredients.

Additional Notes On Ingredients
1) my grandmother says that fresh young lotus roots give the best taste; i'm resorting to freeze-pack ones from the local asian grocer's because i can't find lotus roots around here.

2) sometimes my grandmother adds dried longan as well. if you're a fan of the taste of longan, halve the amount of dates and replace that half with longan.

Special Crockery
i'm using an electric crockery pot for this dish because it takes time for all the ingredients to break down. give it at least twelve hours in the crock pot, although i normally go for twenty-four.

Serves
3-4

Step 1-and-only-1: Toss it all in!
too simple! drop the porb ribs to the bottom of the pot, then followed by the rest of the ingredients, try to leave the roots for last. pour the hot water into the pot, cover and let it cook on high for at least twelve hours. when it's ready, the aroma of the soup will naturally fill the room.

Pork Rib & Lotus Root Soup: Cooking in Crock Pot.

when it's done cooking, you'd see that the soup and most of its ingredients turns a dark umber. the peanuts and dates normally continue to float in the soup.

Final Serve.
the dish is best served alongside some steamed rice. because there's meat in the soup, there's really not much of a need for additional sides to go with.

Pork Rib & Lotus Root Soup: Final Serve.

More Notes
if you're not a fan of rock sugar, you might want to taste the soup before adding any rock sugar to the mixture. this is best done at the half-way mark (i.e. twelve hours, in my case), so that you give the sugar some time to infuse with the other ingredients, and vice versa. alternatively, you can omit the rock sugar altogether because the lycium, dates and longan are all by right natural sweeteners.

Monday, December 11, 2006

Tangy Oven Baked Salad with Steamed Chicken

We've been trying to eat healthy.

This is ... somewhat healthy. I have a little butter in it.
It could be taken out or substituted. (actually, this dish requires no oil whatsoever. the butter was put in for ... flavor. but I'm sure it'll do just fine without.)


Ingredients.
1 large white onion
1 large red pepper (capsicum)
5-8 small white mushrooms
2 cups of french beans
1/2 can cream of chicken soup
1 lemon
15g of butter
3 chicken breasts (or thighs)

black pepper to taste.

Serves.
3.


Step 1: Pre-heat your oven
Switch on your conventionial oven and pre-heat it at 190-200 degrees celcius for about 15-20 minutes. or however long you'd take to prepare all the other ingredients.
(no science here, you really justwant your food to cook. so don't worry about it. just turn it on.)

Step 2: Prepare the vegetables
Wash and chop up the onion, capsicum and mushrooms, then throw them into a deep oven safe
pan (i used a bread tin), along with your beans and mix the vegetables up evenly.

Step 3: the Sauce
The resulting sauce of this dish is made up of the vegetable's own liquid as well, which will appear when they are cooked. so don't worry if it looks a little dry now.
pour in the 1/2 can of soup, letting it flow through the gaps, as well as the juice of the lemon (there is no need to mix it now, just make sure the liquids you have at this point are evenly spread over the top and flow though the gaps. we'll mix it later.)
and finally, slice the butter and lay over your vegetables.

Step 4: Bake!
Cover your vegetables with a piece of foil and shove it in the middle of the oven to bake for 30-40 minutes.

Step 5: Steam Chicken
For simplicity and health, i just washed the chicken, put it in a metal plate on a rack over a pot of water and steamed it with no marinate whatsoever. this will take about 20 minutes or so to cook (poke it to check it. the juices should run clear when its done.)

Step 6: Shred Chicken
Let your chicken cool and tear the chicken into lovely shreds to lay on top of your warm salad.

Final Serve.
The vegetables should be cooked and soft by now. Stir it up in the baking tin and add pepper to taste.

Serve warm on a plate and top off with chicken shreds.
I had some baked potatoes and just added that in as well.

Voila.

warm food ... great in the winter :)

Sunday, November 05, 2006

Cottage Pie.

Cottage Pie.

History.
according to Food Timeline's entry on Shepherd's Pie, this English dish has its origins in the late Middle Ages (i.e. mid-16th Century AD). what began as meat served in pastry "coffyns" (coffins?) was only very late in the 19th Century cooked with mashed potatoes; the latter was a New World produce. Supposedly popular in the Northern regions of England and Scotland where sheep were in abundance (hence cooked with mutton and the name Shepherd's Pie), the pie became the people's answer to asian fried rice i.e. a creative way to rehash leftovers.

Shepherd's Pie = cooked with mutton
Cottage Pie = cooked with beef
Fisherman's Pie = cooked with fish

thesedays, it is but a relatively fuss-free dish for if/when you need to feed either an army of people or a ryce.

Ingredients.
(for meat base)
500g beef mince
3-4 clove, garlic
5-6 cup mushrooms
2-3 sticks, celery
4-5 baby carrots
1 onion (using brown)
2-3 tomatoes (using roma)
1 can, cream of mushroom (not in pic; using campbell's)

(for mash)
3-4 potatoes (using brown)
4-5 bunch, parsley
2-3 tbsp, fresh milk
1-2 tbsp, butter

(for cheese topping)
Pizza Mix (cheddar, parmesan, mozzarella)

you will also need a baking pan of substantial depth, subject to how thick you want your pie to be.

Cottage Pie: Ingredients.

Serves.
3-4.

Step 1: Preparing Meat Mix!
finely chop up all your vegetables, separating the garlic and onion individually from the rest.

oil and heat up a sizable pan over a medium flame. when hot, throw your onions and beef mince into the pot and keep stirring. depending on how strong you like your garlic, you can either throw it in at this stage, or together with the rest of the vegetables later.

let it cook for 4-5 minutes before you throw the rest of the chopped up vegetables into the pan. don't forget to stir! while the vegetables are still cooking, add the cream of mushroom into the mixture. turn the heat down to a smaller flame, let it slowly simmer to a boil, and continue to boil for a while (3-4 minutes).

Cottage Pie: Cooked Meat Mix.

when that's done, pour the mixture into your baking pan and set it aside to cool for 0.5-1 hour. if you don't let it cool properly, the mash isn't going to sit well on your meat mixture. at this point, some people are known to put the meat mix into either the fridge or freezer even.

Making Mash Potato.
skin the potato before you put them in a pot of water to boil. add some salt into the water and let the potato boil for about 10 minutes or until it feels soft enough to mash.

meanwhile, mince or finely chop the parsley up.

when done, remove the pot from the fire and drain the water away. you may begin mashing the potatoes in the pot, adding the parsley, milk and butter in at this stage. mash and blend well until you get a relatively consistent and smooth mash.

Cottage Pie: Mashing Potatoes.

Baking the First Two Layers.
set your oven to preheat at 200 degree C.

apply the mash potato on top of the meat mix which by now should have cooled in the baking pan. when you have the meat mix nicely covered with mash, score the layer of mash with a fork.

Cottage Pie: Fancy Abstract Scores On Mash atop Meat Mix.

when ready, put the whole baking pan into your oven and let it cook for 15-20 minutes. remove the pan from the oven after. apply the cheese on top of the mash, ensuring that you've got all the mash more or less covered.

Cottage Pie: Cheese Layered Baked Mash.

return the pan into the oven for another 15-20 minutes, until your cheese turns a lovely golden brown!

Cottage Pie: Cooked.

Final Serve.

Cottage Pie: Final Serve.

ryce and i both enjoyed it quite a bit. though this version of the cottage pie is a little shallow on the mash potato. so if you're a fan of mash potato, you might have to up the number of potatoes in your attempt.

also, i realised that the meat mixture was a bit too wet for me. but this is more of a problem if you're gunning for presentation points like i do. to ease the problem, you can always drain some gravy from the meat mix before you apply the mash on top.

...
..
.

ETA: 25 1615 November 2006 Saturday.
my friend fiq made a mince beef mix last week by frying the mince beef with tomato ketchup, black pepper and i think a bit of soy sauce. it tasted great! so ketchup might be an easy and inexpensive substitute for the cream of mushroom.

Thursday, October 19, 2006

Vegetable Stir-Fry with Sweetsavoury Sauce

hoookay.

here's an uber simple, basic stir fry dish that you can make with almost any combination of vegetables.

-------------------------------------------------

Vegetable Stir-Fry with Sweetsavoury Sauce

This is kind of my own invention (the sauce).

I've had the older people (the parents) advise me in the past, to not put sugar with vegetables, but i plain disagreed and did it anyway.

They love the sauce.

And I've been making it this way ever since. :)

note: green leafy vegetables will shrink to half the portion after its been cooked. so keep that in mind when trying to figure out how much vege to cook.


Ingredients.
Any Vegetable for 4, cut up to bite size
(here I've used British spring green, tomatoes and radish)
3 cloves garlic, sliced
1/2 onion, medium sized, diced
1 tbsp cooking oil

Optional ingredient:
8 crab sticks, cut into bite size

For the sauce:
2 tbsp oyster sauce
1 tbsp white sugar
1 tbsp corn starch (for thickening)
1/2 rice bowl of hot water
salt & pepper to taste

Serves.
4-5


Step 1: Cut everything up
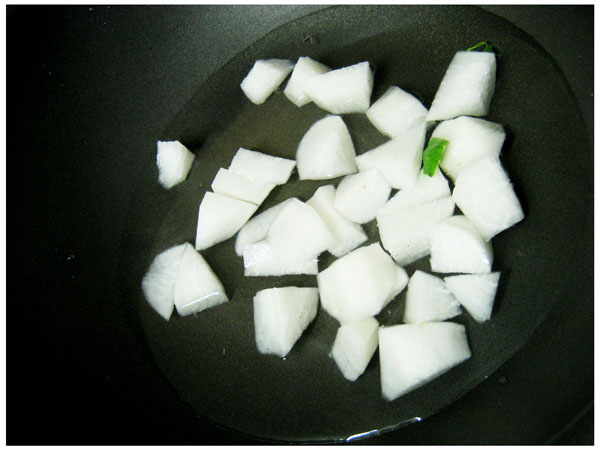
It should look somewhat like this.


Step 2: Boil the radish
This is useful information.
Radish is generally hard and tasteless when its not very cooked.
When you boil it, it goes soft and juicy and sweet.
You'll know its done when it turns semi-transluscent.


Step 3: Make the sauce

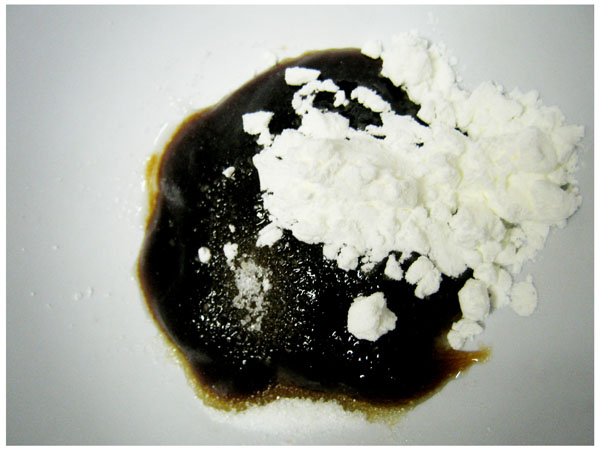
Get a bowl and put in all the ingredients for the sauce and mix it up.
The reason why we use hot water, is to dissolve everything.
It will look cloudy and brown now, but when you cook it, corn starch goes clear.
Leave this aside.


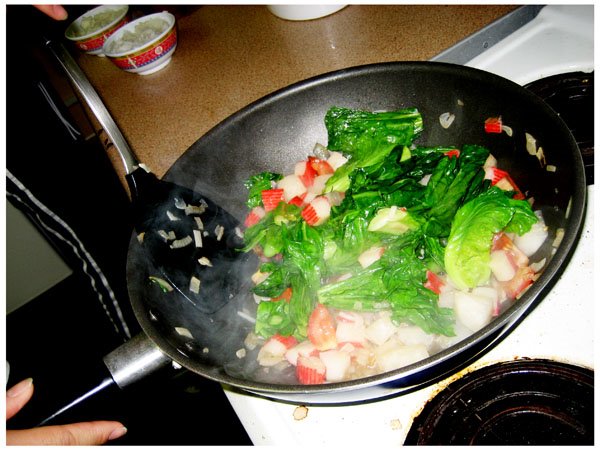
Step 3: Stir-Fry!
Heat up the oil in the Wok.
When the oil is hot, throw in the onion and garlic and fry till its fragrant.
(essential in most chinese cooking.)

Now, by order of cooking time (or vegetable hardness), throw the remaining into the wok.

Pour in the sauce all around the vege and continue frying till the vegetables cook.
Use the wok's cover to trap the steam to speed cooking up and to keep the juices in.


Final Serve.
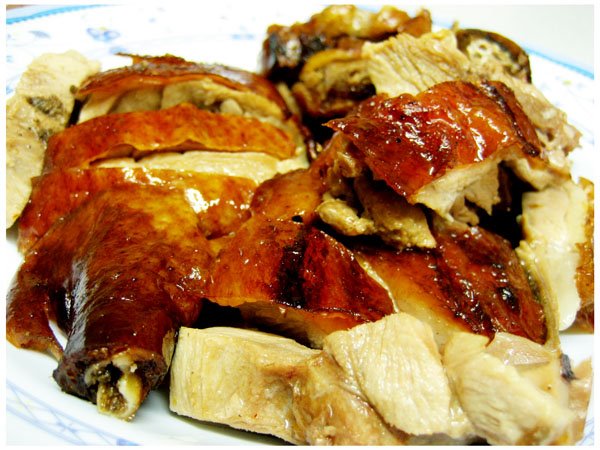
We were lucky. Someone bought us some duck to go with our vege!
It was sweet and savoury and oh so good.
Everything goes really well with steamed white rice.


I'm getting hungry just typing this.
Someone needs to teach me how to make roast duck.

:)

Monday, October 16, 2006

Savoury Steamed Egg & Mince

Hello all.

I'm terribly sorry for the long absence ... but I haven't had the time nor the resources to whip up anything remotely exciting in the last couple of weeks and here's the reason why:

The people in my flat are adverse to trying new things AND they also have meat preferences, which means i'm generally stuck cooking everyday, homecooked chinese meals.

1 meat dish (pork or chicken only) and 1 vegetable dish.

I'll endeavour to create some exciting weekend lunches tho'.


Just for me and you. :)


With that said, here's a simple homecooked cantonese dish that everyone can make and is very traditional and delicious!

-----------------------------------------------------

Savoury Steamed Egg & Mince

My grandmother used to make this for lunch. It brings back loads of memories. You can generally find this in authentic cantonese homestyle cooked restaurants!

There are several versions of this dish, one with salted fish, one with tofu and one with just egg.
I generally prefer just egg or with tofu, because it's more soothing and smooth to eat.

note: you will need some sort of steaming rack and plate.

Ingredients.
300g minced pork
2 eggs
1 tbsp, sesame seed oil
3 tbsp, light soy sauce
1 tsp, white sugar
3 tbsp, garlic granula
2 dashes of black/white pepper
(*optional: 1/2 block of silken tofu)

Serves.
4-5


Step 1: Marinate the Minced Meat
Wash your hands and use them.
Put the minced meat in a bowl and add the pepper, salt, sugar, sesame seed oil and light soy sauce, and mix it all up evenly with your fingers.
Leave aside for at least 10 mins. (longer if you're not pressed for time.)

Step 2: More mixing
Crack your 2 eegs into the bowl and mix evenly (break the yolk)

*as an option, you can also mix in the tofu. just be careful not to mash it up too much. you still want a bit of texture.

Step 3: Steam away!
Place your egg'n'mince into a dish suitable for steaming.
(I used a metal plate. good heat distribution)
And just Steam for about 20mins :) easy.

Final Serve.
You can opt to keep it in the same dish (for a home feel) or dress it up by plating it. just tip it out of the cooking dish along with the savory juices into a clean dish and serve steaming :)

[sorry i don't have a picture of the final product ... it smelt so good that day we slurped everything up!]

try it!

Thursday, October 12, 2006

Crispy Noodle Salad.

Crispy Noodle Salad.

sometime ago, i attempted this dish at ryce's place to no avail. since getting flour for the crepes, however, i finally have the necessary ingredient to ensure that the noodles turn out the way they should when fried.

Ingredients.
2 slab, instant noodle
3 slice, smoke ham
3-4 bunch, parsley or coriander/ cilantro
3 tbsp, cream cheese
1 cup, coconut cream
1-2 cup, flour
3 tbsp, garlic granula
some cooking oil (for deep-frying)
*black pepper to taste

Crispy Noodle Salad: Ingredients.

Serves.
2-3.

Step 1: Cook your noodles.
simple: boil the noodle in a pot of water until it's cooked. as i seldom attempt instant noodles in its simplest fashion, i only learnt from ryce that instant noodle's really only cooked when the strands have separated themselves and are soft to a bite.

when cooked, drain the water away.

Step 2: Coat noodles with flour.
coat the noodle with flour, ensuring that the noodle's sufficiently floured up. the flour helps to absorb excess water and allows the noodle to stay separate in the frying process.

Crispy Noodle Salad: Cooked Noodles In Flour.

Step 3: Prepare your sauce.
Mince the parsley and ham up. Over a medium flame, pour the coconut cream into the pot . add the cheese, parsley and ham into the solution. allow it to come to a boil and simmer for about 5 minutes.

Step 4: Fry the noodle.
while you're awaiting the sauce to boil, pour about half a cup full of cooking oil into a wok/ pan over a high flame. when the oil is hot, throw a handful of the floured noodle into the pan and let it fry. it should take 5-7 minutes for the noodle to fry. if you do not have enough oil for actual deep-frying, ensure that you stir the noodle constantly.

fry until golden brown.

repeat the process until you've fried all the noodle. you might have to change the oil and clean the wok/ pan at some point if it gets too dirty.

Final Serve.
in each bowl of crispy noodle, pour the sauce on top before sprinkling the garlic granula and pepper.

while this attempt was far better than the last, the sauce ended up a bit too thick. i would suggest adding 1 cup of fresh milk or just some water into the sauce-cooking process at Step 3 to thin the solution. not too much of that, otherwise you might lose the coconut flavour of the sauce :)

Crispy Noodle Salad: Final Serve.

Wednesday, October 11, 2006

One-Step Whitebread Pizza.

remember the loaf of bread that was lying in ryce's fridge? well, other than toasting your bread, or making french toast out of it, we can use it as base for your favourite pizza toppings!

Ingredients.
6 slice, whitebread
3 roma tomatoes
4, cup mushroom
3 piece, smoked ham (or your favourite meat, e.g. smoke salmon, left over chicken)
3 tbsp, sour cream (you can use other sauce base like bolognese)
some cheese (the usual suspects like mozzarella, parmesan, etc)

Whitebread Pizza Ingredients.

*missing: 1 capsicum (ryce doesn't do capsicums -sigh-)

Serves.
3

Step 1: All at Once!
dice the tomatoes, mushrooms and ham into fine pieces. coat the bread with a generous layer of sour cream, then apply the tomato, ham and mushroom on it. top that with a good cover of cheese.

preheat your oven to about 150 degrees, and pop your pizza in for 5-10 minutes. basically until your cheese melts and browns a little at the edges.

Viola!

Final Serve.
easy to prepare, tastes good, and helps rid of surplus without having to either dump them away or promote fungus growth!

Whitebread Pizza.

Thursday, October 05, 2006

Roasted Honey-Glaze Chicken & Potato Tuna Salad.

Roasted Honey-Glaze Chicken.

sio, ryce and i returned more than an hour ago from an easy night of beer. there's something about a night of alcohol and supper, somehow one inevitably leads to the other. as if the beer or champagne we consume doesn't contain enough carbohydrate to set us back a few grammes.

anyway, there was meat thawing in the sink, left out initially for dinner. i guess it's about time we tried another one of them fuss-free recipes. admittedly though, fuss-free doesn't necessarily mean low calorie count, so i'm just going to avoid eating for the next few days to compensate.

Anna, Billy and i = BFF!

Ingredients.
(for the chicken)
4 pc, chicken thigh (part of chicken negotiable)
4 tbsp, soya sauce
4 tbsp, honey
4 tbsp, chinese rice wine
2 tbsp, black pepper
4 bunch, parsley

Roasted Honey-Glaze Chicken: Ingredients.

(for the salad)
3 potatoes (nude for me)
1 onion (i'm using brown)
1 can, tuna (with olive oil)
1 lemon
4 inch, ginger
3 bunch, spring onion/ scallion
2 tbsp, black pepper (i'm a fan)
1 tp, salt

Serves.
4

Step 1: Marinating the chicken.
mince the parsley into a fine grain, and mix it together with the rest of the marinade ingredients. rub the marinade into the chicken, making sure that you get some marinade (especially the parsley) under the skin. leave the chicken and marinade to soak for at least half an hour.

Step 2: Preparing the salad.
dice the potato, and braise it in boiling water for about 5 minutes with the salt; drain water after. mince the ginger and dice the onion, then mix them all with the potato and tuna. stir the black pepper in and we're ready for the roast.

Step 3: Cooking everything.
set your oven to preheat at about 180degrees for 10 minutes. when ready, put the salad and chicken in. make sure you take both dishes out for a stir (the salad) and flip (the chicken) 15 minutes into the roasting. another 20 minutes and we're ready to remove both from the oven.

Step 4: Finishing the salad.
when the salad's done roasting, mix chopped spring onions in and juice the lemon into the salad.

Final Serve.
the potato would seem a little crunchy till you bite into it--it's far softer than you'd imagine. if you decide not to use tuna infused in olive oil, just up the amount of ginger and lemon you're adding to the salad. flavouring for the salad should be kept as natural as you can possibly muster. (alternatively, use some of the chicken's marinade left behind by the roast.)

Roasted Honey-Glaze Chicken: Final Serve.

the recipe for the chicken is good also for steaks, and prepared in the grill, on the pan, or at your barbecue.

Wednesday, October 04, 2006

Beef Steak in Port & Camembert Cheese.

Beef Steak in Port & Camembert Cheese: Final Serve.

the other day at Safeway (Melbourne's answer to Woolworth's), ryce and i picked up--amongst other things--a bottle of Tawny Port, a pack of "special sale" camembert and some "special sale" beef steak. now using whatever's available to us, we thought it would be good to revisit one of my older steak recipes.

along with the steak, we're going to have a simple side of grilled vegetables and a few pieces of Woolworth's cheesy sausages. i'd also explain the vegetables, but not the sausages...

Ingredients.
(for the steak)
2 beef steaks (again i'm using scotch fillet)
1 cup, Port wine
3 tbsp, camembert (i usually use blue cheese)
1 tbsp, black pepper
4 bunch, coriander (i normally use parsley for this dish)
1 tbsp, olive oil (for the pan-fry)

(for the vegetable side)
2 tomatoes
1 carrot
4 asparagus
1 lime
1 tbsp, salt
2 tbsp, sesame oil

(optional)
6 sausages (abt 2" each)

Serves.
2

Step 1: Marinating the beef.
easy: place steaks in bowl, add port, black pepper and minced coriander. stir it about a bit to ensure you've got everything mixed well, and leave it to soak for at least half an hour.

Beef Steak in Port & Camembert Cheese: Marinating.

cut the cheese up and mash it up a little so that it's nicely pasty.

Step 2: Prepare vegetables.

chop the carrot and asparagus up. (by the way, i hope everyone is familiar with the whole rid-the-bitter-end-of-your-asparagus routine.) add them to a bowl, and pour some boiling water into the bowl. add a tbsp of salt and leave everything to soak for about 5-10 minutes. drain water after.

while soaking, dice your tomatoes, and slice the lime into reasonable pieces for easy juicing later.

Beef Steak in Port & Camembert Cheese: Vegetable side.

mix all your vegetables together in preparation for the grill. preheat your oven for about 10 minutes, then set it to about 200 degrees, before setting the vegetables in for about 20 minutes.

when it's done, add the sesame oil to the mixture, and we're more or less done.

Side: Something about sausages.
on today's Huey's Cooking Adventures, Huey brings up a tip on cooking sausages. apparently, before you set it in your pan to fry, you should braise the sausages with warm (not boiling) water for about 5 minutes. if the sausage skin breaks open, you know the water's too hot.

Beef Steak in Port & Camembert Cheese: Sausage side.

NOTE: i can't quite remember the exact type of sausages, or the rationale behind this move, but we got the gist and in Huey i trust.

Step 3: Cooking the steaks!
over a big flame, pour your oil into the pan and let the pan heat up. when it's hot, place your steaks into the pan and let it cook for about 2-3 minutes on both sides (if you're into medium-rare like me).

if you're particular about sealing the meat, you'd have to continuously flip your steaks every 20 seconds until both sides brown.

once cooked, move the steaks off the flame and place them on your serving plates. lower your flame to medium, and pour the rest of the marinade in. let it simmer until it's reduced to about half.

while waiting for the marinade, apply a generous amount of cheese on the top side of the steaks. try to even it out as much as you can.

when the marinade has been reduced, pour that onto the steaks.

Final Serve.
i've served the lime slices together with the vegetables to allow the guest (ryce) free reign in how sour she wants her vegetables to be. the sesame oil will provide some fragrance and taste, but what really gives the punch will be the lime juice.

as much as possible, the steaks should be served right after the marinade is poured. wait too long and you might only have a thin film of cheese left on your steaks since everything else melted away. don't worry that your steaks will be too sweet from all that port, with the cheese, parsley/ coriander and pepper, it will be a really interesting mouthful of beef.

Beef Steak in Port & Camembert Cheese.

enjoy!